
Bug-A-Day Challenge 2020 Gallery


Bug-A-Day Challenge 2020
Gallery Page


Bug-A-Day Zero: Happy New Year!

With a New Year comes the desire to improve oneself...in other words...Resolutions. For starters, I've decided to renew my Bug-A-Day project and see where that takes me. Maybe I can get past the three-month mark this time. Maybe I won't make it past one. ;) The goal is to complete a year.

The point of it is not to be perfect, but to work on something everyday. This kind of exercise helps get the creative juices flowing again, and is also good practice for techniques I don't normally use (ahem,...brush pen...).

This is just the gallery page. Each individual project has its own post should you wish to read more about it (the Days are links).


Ambush Bug


Hummingbird Moth


Toad Bug


Frog-legged Leaf Beetle Part I

Day 5

Frog-legged Leaf Beetle Part II


Sick Leave

Happy Anniversary!

Day 8

Devil's Coach Horse

Day 9

Spoonwing

Day 10

Roach on the Face


Impossibly Fuzzy Bee

Day 12

Brushed Stag Beetle

Day 13

Fun with Dremel

Day 14

Brushed Mantispid


Another Sad Cockroach


A Quick Re-creation


Acorn Weevil


Syrphid Bee Fly


Dremel Stag Beetle Part I


Life Finds A Way


Dremel Stag Beetle Part II


Brushed Buffalo Tree Hopper
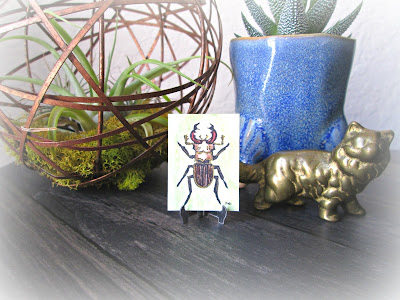

Stamped Stag Beetle


The Bee's Knees


Brushed Leaf-footed Bug


17-Year Periodical Cicada

Day 27

Ice Scorpion


Fossil Wasp


Katydid Nymph

Day 30

Hawk Moth


Ant Mimic Mantis Nymph


Boxer Mantis Nymph


Brushed Violet Ground Beetle


Tropical Stinkbug


Stonefly Larva


Brushed Pasimachus

Day 37

Another Sad (and Ill) Cockroach


Roach sucks at Kite Flying


Roach's Sandwich is Ruined


Full Moon Luna


Brushed Scarab


Sick Leave, or, Brushed Syrphid Fly


Luna Moth Earrings


Ant Lion Larva


Backswimmer


The Bee's Knees Part II (or III?)


Black Beauty Walkingstick


Giant Waterbug, and a Story


Brushed Bombardier Beetle


Leafhopper


Bee Earrings


The Beetles


Brushed Dobson Fly


How I make shrink plastic earrings

Tropical Stinkbug Earrings

Blue Weevil Earrings


Rainbow Leaf Beetle


Day 59: Brushed Blue Pleasing Fungus Beetle

Day 60: Brushed Metallic Wood Boring Beetle

Day 61: Colored & Splattered


Tiny Ground Beetle Watercolor


Tiny Stag Beetle Watercolor


Day 64: Brushed Oak Treehopper

Day 65: Brushed Candystripe Leafhopper

Day 66: Paint & Splatter


Alas! These challenges are difficult to keep up with!


Comments

Popular posts from this blog

Day 16 - A Word for That

"Invent a new word and illustrate or demonstrate its meaning" " PETASUSAURUS " Noun . A lizard, preferably a chameleon, that is placed on the head to control bothersome mosquitoes. From the Latin,  petasus , meaning "hat" and the Greek,  sauros . meaning "lizard;"  or literally, a "lizard hat." Modern usage : " Hey man, nice petasusaurus! " (I haven't drawn in anime style for ages!) (October 17, 2016) Update: I've been corrected, "Hey (wo)man, nice petasusaurus!" Thanks, AS

How I Make Tiny Art Books

  Moon Phase & Black Cat Version II Tiny concertina softcover art book, 1-1/8" square I have loved tiny books since I was a kid, and I used to both collect them and make them. I usually made them with staples, because as a kid, that seemed like the most logical binding, but I also experimented with string, tape, and brads. I would draw comics in them, usually cats, after they were bound, which was rather ass-backwards of me.  So now I'm a wee bit older and I still love making books (and I still have 4 tiny books from my original collection). I wanted to show how I made this one, which is composed of thick black paper, parchment style paper, hand-carved stamps, and a ribbon closure. All materials are archival safe. How it's Made: It always begins with a pencil drawing. After sketching out the moon phase cats, I transferred the drawings to pink stamping material and carved each one by hand. I love the primitive look of hand stamping and I wanted this book to be reprodu

Creating a Linoleum Block Print

Maneki Neko , completed July 23, 2015 Here is a photographic illustration of how I make lino block prints...  original pencil sketch Every lino starts with a sketch. Often I will flip the image (and resize if necessary) using the computer. Sometimes I can trace onto the block directly from the original. Here I am using graphite paper to transfer the drawing (which is under the white paper in this photo). Note that the image has been flipped. Since I work primarily on a small scale (usually smaller than 2" x 3" - 5 x 7.5 cm), I typically use just three blade types for cutting the design into the linoleum: the #1 V blade for details, the #2 V blade for further outlining, and the #5 U blade for removing the excess linoleum. Here I have cut the detail lines and the outline once with the #1 blade. This is the second outline with the #1.  I widen the outline around the image in stages for two reasons. First, one is less likely to